The Capricious Coffee Table
- Merwyn Dsouza

- Jun 28, 2020
- 3 min read
This coffee table began around two and a half years ago :-D .
When I went to purchase timber for the Liam Sky Bench. Somewhere during Jan 2018 :-D . The guys at the Lumber mill were pretty amused that I was thinking of making the bench myself and they threw in some free teak wood :-D

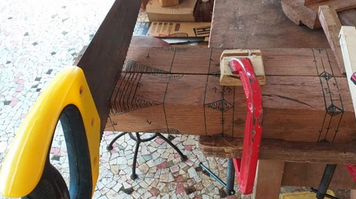
I didn't know what to do with that piece, until last year May 2019, when I decided to use it for an epoxy pour experiment. So somewhere around May 2019, I milled the half log into two flat panels, and I have a nice two inch long scar on my right foot as proof of this #rip-cut with a #handsaw :-) .

Back then, I had a design in mind for a coffee table and I thought to myself "Why not? It is all about learning anyway." And so it began.

I cut the frame out from old reclaimed teak wood. These used to be door frames of an old East Indian home. It had all sorts of brad nails, screws embedded in it, plus years of wear and tear :-D . It was fun working with these challenges.
My earlier design was simple, but then I got caught up with my full time job and the designed remained unfulfilled but the table became functional.

During the course of time ,I taught myself how to use the #fretsaw . I learnt about compound cuts . My research further led me to understand how #Cabriole legs were cut. ( refer to Queen Anne furniture design ) .

One thing led to another and I decided to try making one of these with whatever tools I have. The #lockdown gave me an opportunity and time to revamp this coffee table frame and try out this design, again an experiment. I used hand held power tools for some of the build. There is a vast difference when one makes Cabriolet legs using machines and hand cutting them. The process of making them using hand held power tools or purely with hand tools is more #challenging and #tedious. Add to it the confusion and there by the unforgiving mistakes, if one is not careful.
I managed to cut out the legs and the frame and realized that now the table top didn't look worthy of the frame :-D
So I decided to complicate my life and bring in another challenge to over come. The table top was fitting the frame exact, without any over hang on either side and so I decided to extend the sides. This process looked easier on the computer :-D
I finally made a frame and cut rabbets to accommodate the top. Then went a step ahead to try out the Shou Sugi Ban technique :-D . Yes , I am #impulsive like that.
The outcome by itself looked great, but somehow I didn't like it once it went on the table frame. I then realized
I was spending more time with this #table than anything else. So for now I close this project :-D. The piece is sanded - I have offered it a generous amount of Double Boiled Linseed Oil and soon It will get a nice #luster of wax finish.

An additional note : The table frame joinery is made to friction fit :-D , hence I have not glued it up. So that , whenever I want I can just make new stretchers and aprons ( the parts of the table that connect the legs ), with new length , change the table top and I have a different sized coffee table :-D . Also the table top is not glued to the frame and hence I can change the table top to whatever design tickles my fancy at that time :-D Maybe a Herring bone design or another fancy resin epoxy or a live edge. Who knows where my mind may wander !! :-D


Comments